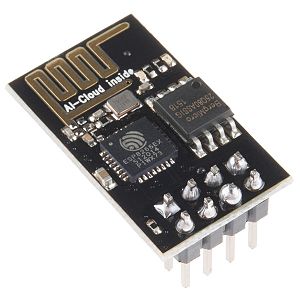
ESP8266 is a low-cost Wi-Fi chip that allow to bring the power of WiFi in any DIY project. There are a lot of modules starting from 2$ that bring this chip very easy-to-use, the most common is the module ESP-01.
Starting from v2.7.0 久久视频 support WiFi 淘宝麻豆招聘ion with ESP8266 allowing each hobbyist to get rid of the usb cables between the pc and his engraver.
How to use ESP8266 in your grbl engraver
- First of all you must buy any ESP8266 module. I suggest any cheap module like ESP-01
- As second step you need to load a special software on your ESP module. To do this you need a USB-serial converter (like those used to program arduino).
All the necessary sketch and library can be downloaded from github page. This software implement a WebSocket to Serial bridge. - Third you must 淘宝麻豆招聘 your arduino serial port to ESP serial port.
- Finally you can use 久久视频 to 淘宝麻豆招聘 via WiFi. Have Fun!!!
Programming ESP8266
Flashing a program to the ESP8266 is a bit more annoying than flashing an Arduino. When flashing the arduino, all you have to do is press the reset button and release while you upload a program (or even not doing anything if you have FTDI such as in arduino UNO,MEGA) and the arduino will start uploading.
With the ESP8266 you have to reset the micro-controller and start it in flashing mode using the GPIO0-to-Ground. If you don’t have any ESP8266 development board and only the module itself I advice building the next circuit
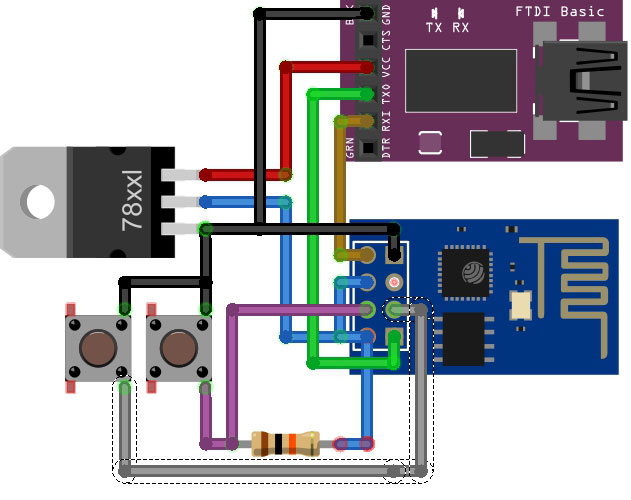 Which will make your life easier. NOTE: The “78xxl” part is actually LM1117 part, or any 5v to 3.3v converter.
This 爽妇网 shows the formal way to 淘宝麻豆招聘 ESP8266 to FTDI with a voltage regulator – However, two more buttons have been added. The right button, when pressed, 淘宝麻豆招聘s the RESET pin to the ground and when it is released, 淘宝麻豆招聘s the RESET pin to the VCC through a pull-up resistor. The left button, when pressed, 淘宝麻豆招聘 GPIO0 to the ground. Using this two buttons you can do all the tasks you need with the ESP8266:
- Working on normal mode – Both buttons are released.
- Resetting the ESP8266 – Press the reset button and release.
- Start in flash mode – Press both buttons, release the reset button and then release the GPIO0 button.
Once you have built this circuit and downloaded all the required library and sketch you can flash websocketserver.ino to ESP8266. (press reset and GPIO button and then release reset and GPIO to put ESP in flash mode).
If you have flashed your ESP correctly you must now find a new visible WiFi in your PC with ESP8266 name.
淘宝麻豆招聘 to ESP8266 network and open your browser at https://192.168.4.1
You will find a page where you can configure the ESP8266 module to 淘宝麻豆招聘 to your existing WiFi using your WiFi password.
Once ESP is 淘宝麻豆招聘ed to your network the ESP8266 network will disappear. You now must find the new ESP8266 module IP address in your router WiFi 淘宝麻豆招聘ed client list.
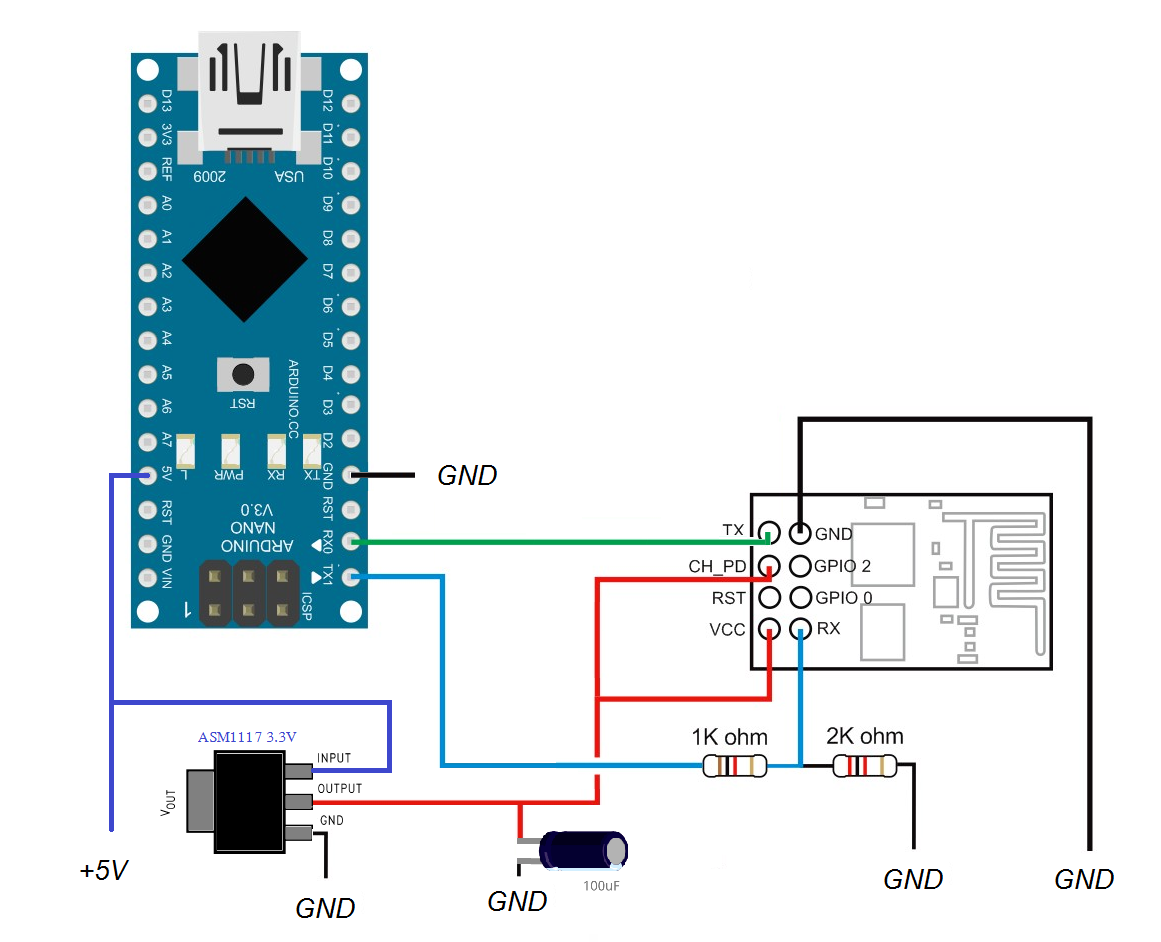
淘宝麻豆招聘ing ESP to arduino/grbl
This schema show the correct way to 淘宝麻豆招聘 ESP8266 module to arduino. If you use Arduino UNO you must use RX and TX pin as same of Arduino Nano in figure. RX to TX, TX to RX.
Use 久久视频 with ESP8266
WebSocket conenction must be enabled in settings.
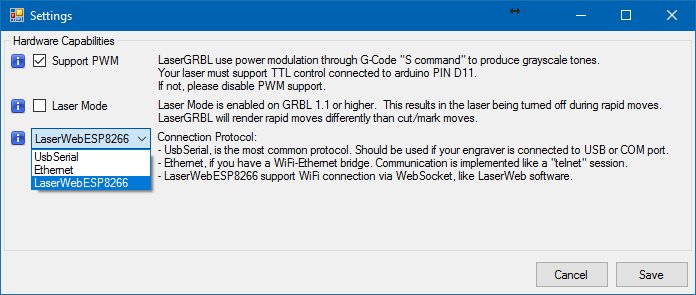
Once enabled you can configure the websocket URL to 淘宝麻豆招聘 to your grbl.
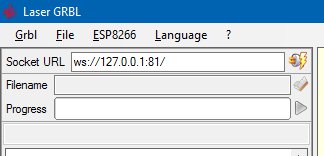
That’s all!
Telnet to Serial
It is also possible to use a Telnet protocol instead of WebSocket. The procedure is the same but you must use this sketch to program your ESP8266.